This shop has been compensated by Collective Bias, Inc. and its advertiser. All opinions are mine alone. #DIYHolidayWithSCJ #CollectiveBias
Hosting for Thanksgiving is one of my favorite parts of the season. I love having family and friends over for endless amounts of food and great conversation. It gives us all time to catch up on the happenings of the past year - and I think for all of us it's been quite an eventful year!
Before the season officially gets underway I like to start getting ready for any gatherings I have planned for the coming months. I always do a thorough cleaning and home refresher around this time of year. I go through each room of the house and make sure there aren't any of the usual signs of neglect: those bizarre spiderwebs that magically appear and the mysterious blobs of dust hiding behind and under furniture. Sure at Halloween, you can claim they're intentional but afterwards.....time to clean!
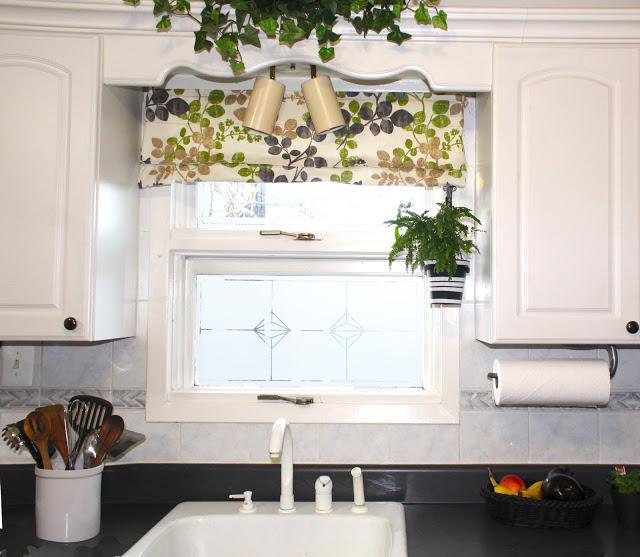
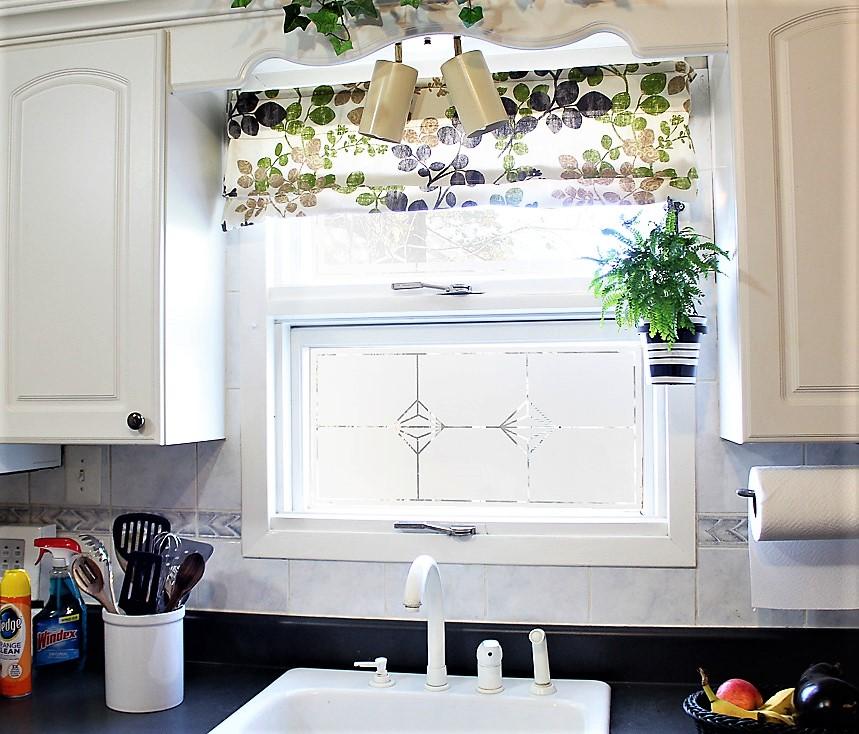
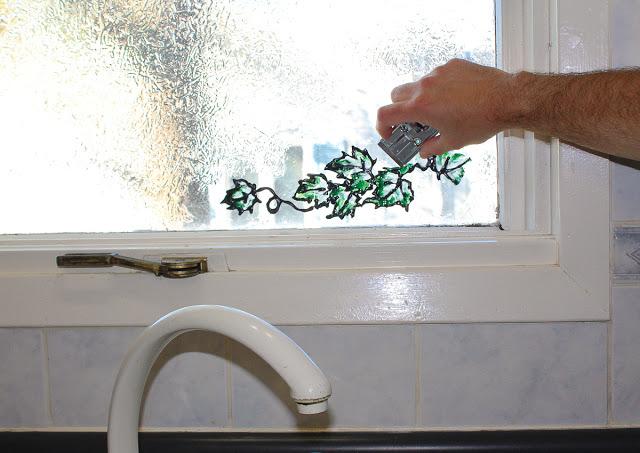
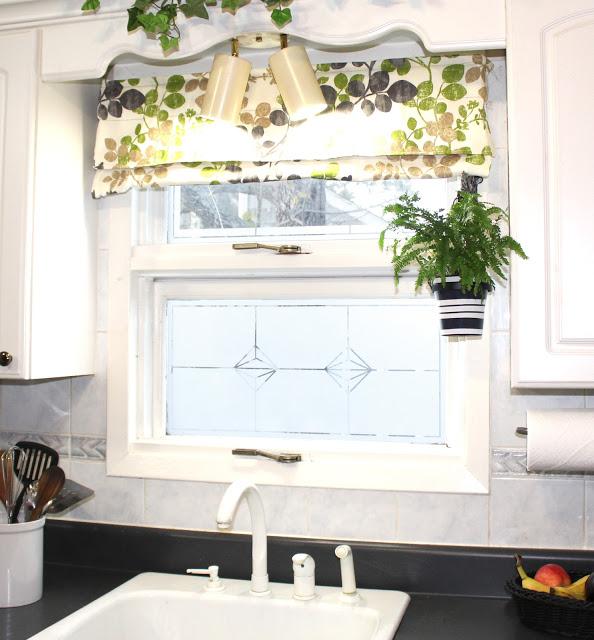
It seems like no matter how comfy and cozy I make the rest of my house everyone always ends up congregating in the kitchen. At first, I thought people just liked my kitchen... then I realized this happens to everyone. The kitchen just seems to be a great place for people to gather and talk. So I've decided, this year, to start that much overdue project. I'm going to finally update my kitchen window. Believe me, it was due. Talk about outdated. As you'll see from the photos, the craft store Gallery Glass plastic cling flowers are no longer the hot window dressing they once used to be. So, I decided to go with a more modern updated etched glass look with a subtle geometrical design. However, I'm not actually using the strong chemical etching cream to create this look but rather a faux etched glass medium! Keep reading and I'll show you how to create a great, sophisticated look for a lot less money and a lot less mess than traditional etched windows.
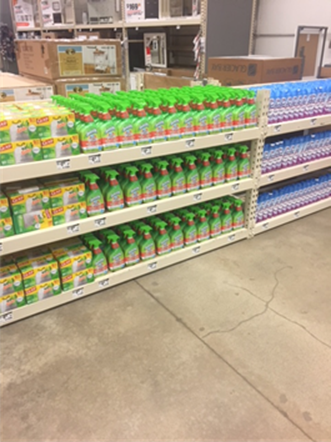
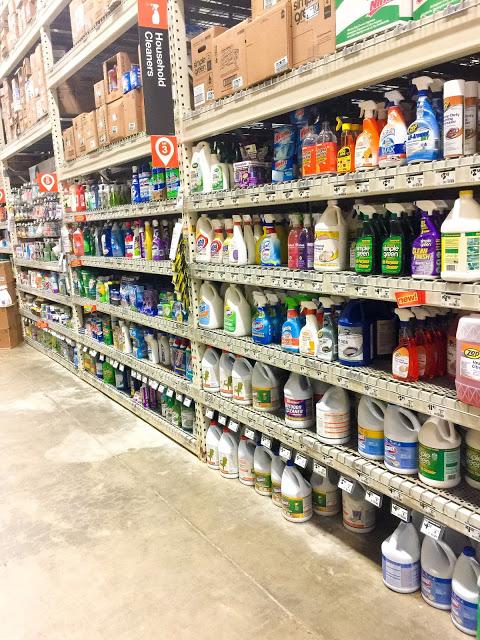
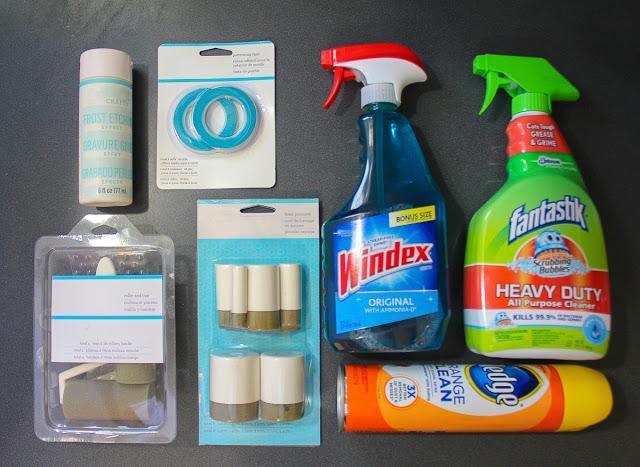
For this tutorial, it's important to make sure your windows are super clean. We're essentially going to be painting on the faux etching medium so the product really needs to adhere properly. I chose to go withWindex® Original Glass Cleaner. I mean its name says it all...original. It's been used since forever and why take a chance on my project no turning out the way I want it. So this time I skipped the vinegar and went with its patented ingredient, Ammonia-D® that thoroughly removes any and all old residue. I found all the cleaning supplies I needed right at Home Depot. They have a huge aisle with all of the cleaning supplies you'll ever need.
For this tutorial, it's important to make sure your windows are super clean. We're essentially going to be painting on the faux etching medium so the product really needs to adhere properly. I chose to go withWindex® Original Glass Cleaner. I mean its name says it all...original. It's been used since forever and why take a chance on my project no turning out the way I want it. So this time I skipped the vinegar and went with its patented ingredient, Ammonia-D® that thoroughly removes any and all old residue. I found all the cleaning supplies I needed right at Home Depot. They have a huge aisle with all of the cleaning supplies you'll ever need.


I needed to remove all of the old Gallery Glass plastic from my windows so I used a razor glass scraper to carefully peel them off.
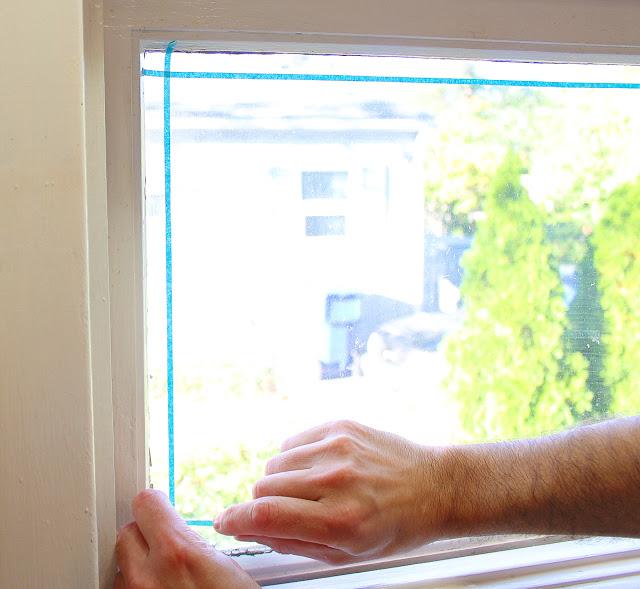
Use your Windex® Original Glass Cleaner to make sure absolutely all residue is removed from the glass. This is super important for the medium to work properly.

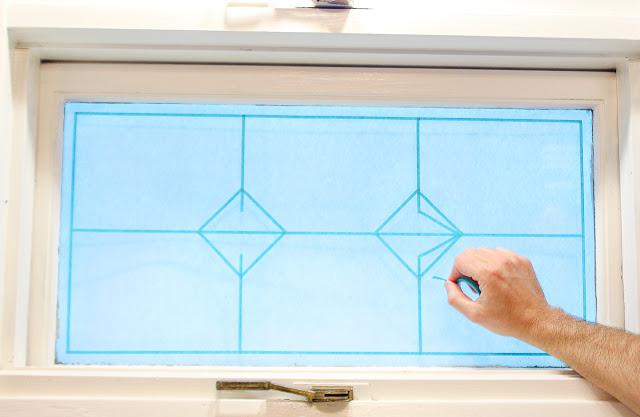
Use the detailing painter's tape to square off a border for the window.
Make sure to clean off all of the excess grease and grime in the corners and crevices. ScrubbingBubbles® Fantastik® product works great. The antibacterial solution cuts the grease and grime and dissolves it on contact while disinfecting the whole area....and who doesn't love a clean kitchen!

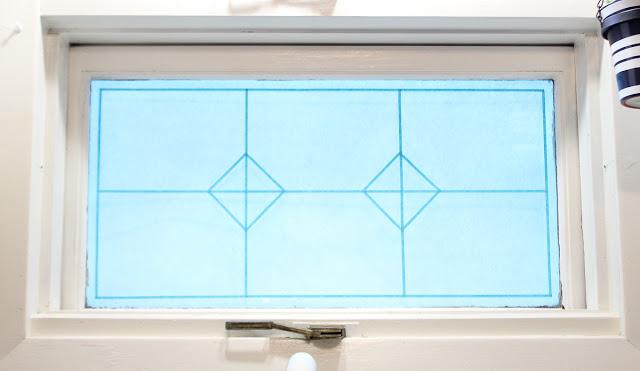
I divided my windows into three separate sections.
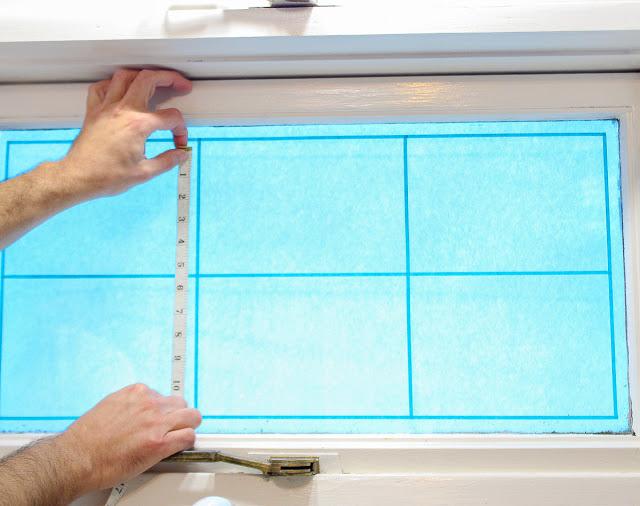
Tape off a diamond pattern in the center. measuring equally from top to bottom.
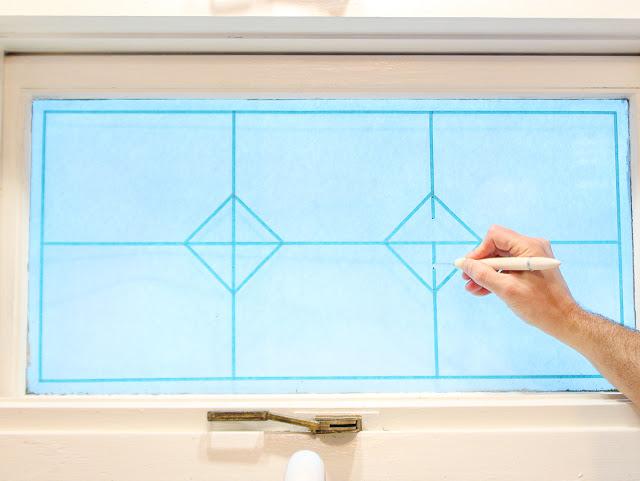
I cut away the top and bottom of the tape and created additional triangles emanating from the center of each larger one on top and bottom.
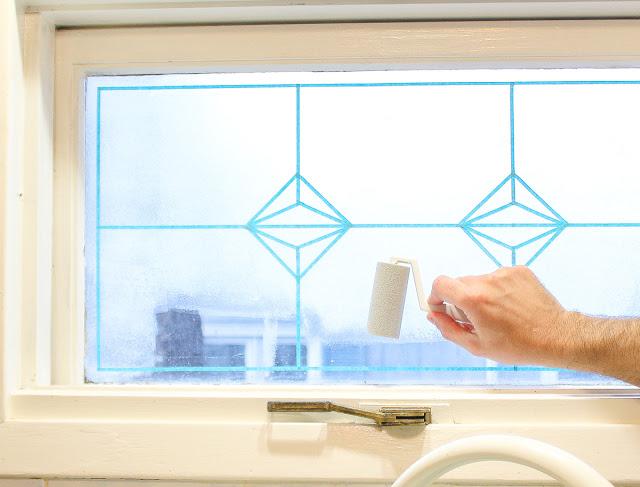
Make sure you "roll" the frost etching medium gently instead of shaking, to avoid air bubbles.
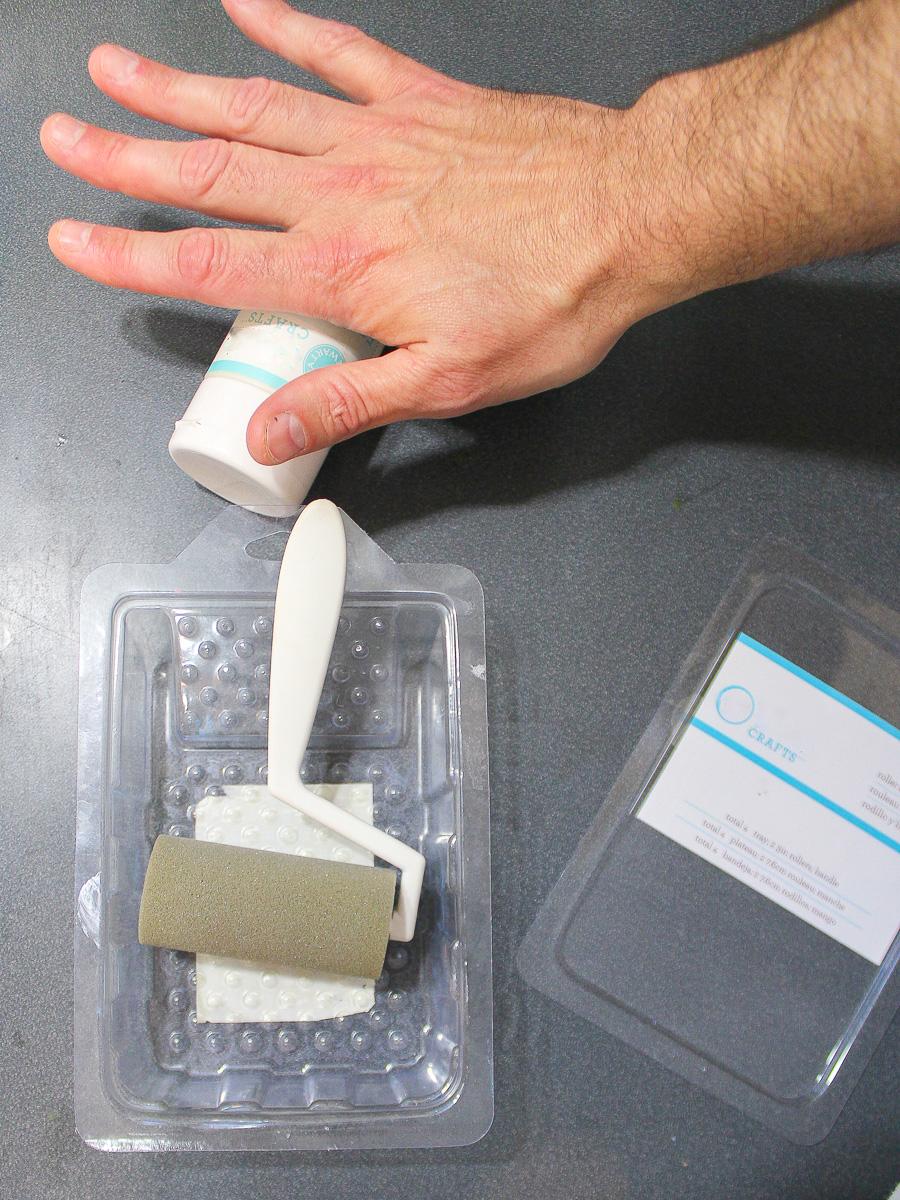
I find that a light coating of etching effect medium using the foam roller provides the best results.
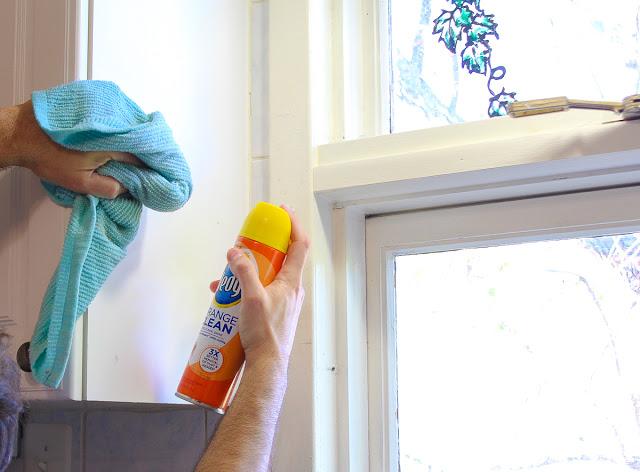
Wait a few hours for the medium to set and pull off the detailing tape. Although, I completely let mine sit overnight before removing the tape and had no problems. Finish your windows with modern Roman shades or a decorative plant. Clean and shine the cabinets with a littlePledge® Orange Clean and you're good to go!
Thanks for stopping by!!!
Be sure to share any of your own tips or advice for how you prepare for Thanksgiving
in the comment section below.
Have you recently updated your kitchen? Feel free to share, we'd love to hear!
Also, be on the lookout for Pledge®
product promotions on display
in Home Depot stores 11/1/17 through 1/31/18!