
I created a great way to duplicate the look of the super trendy wall mounted Staghorn Fern and without all of the hassle. I absolutely love the look of those ferns hanging on walls but, they just don't agree with the dry air in my house. They love a super humid, moist, rainforest-like environment and my home is drier than dry... I'm talkin' Sahara desert dry. Yup, it's pretty dry! Well I've found the perfect solution. Keep reading and I'll show you exactly what I came up with....
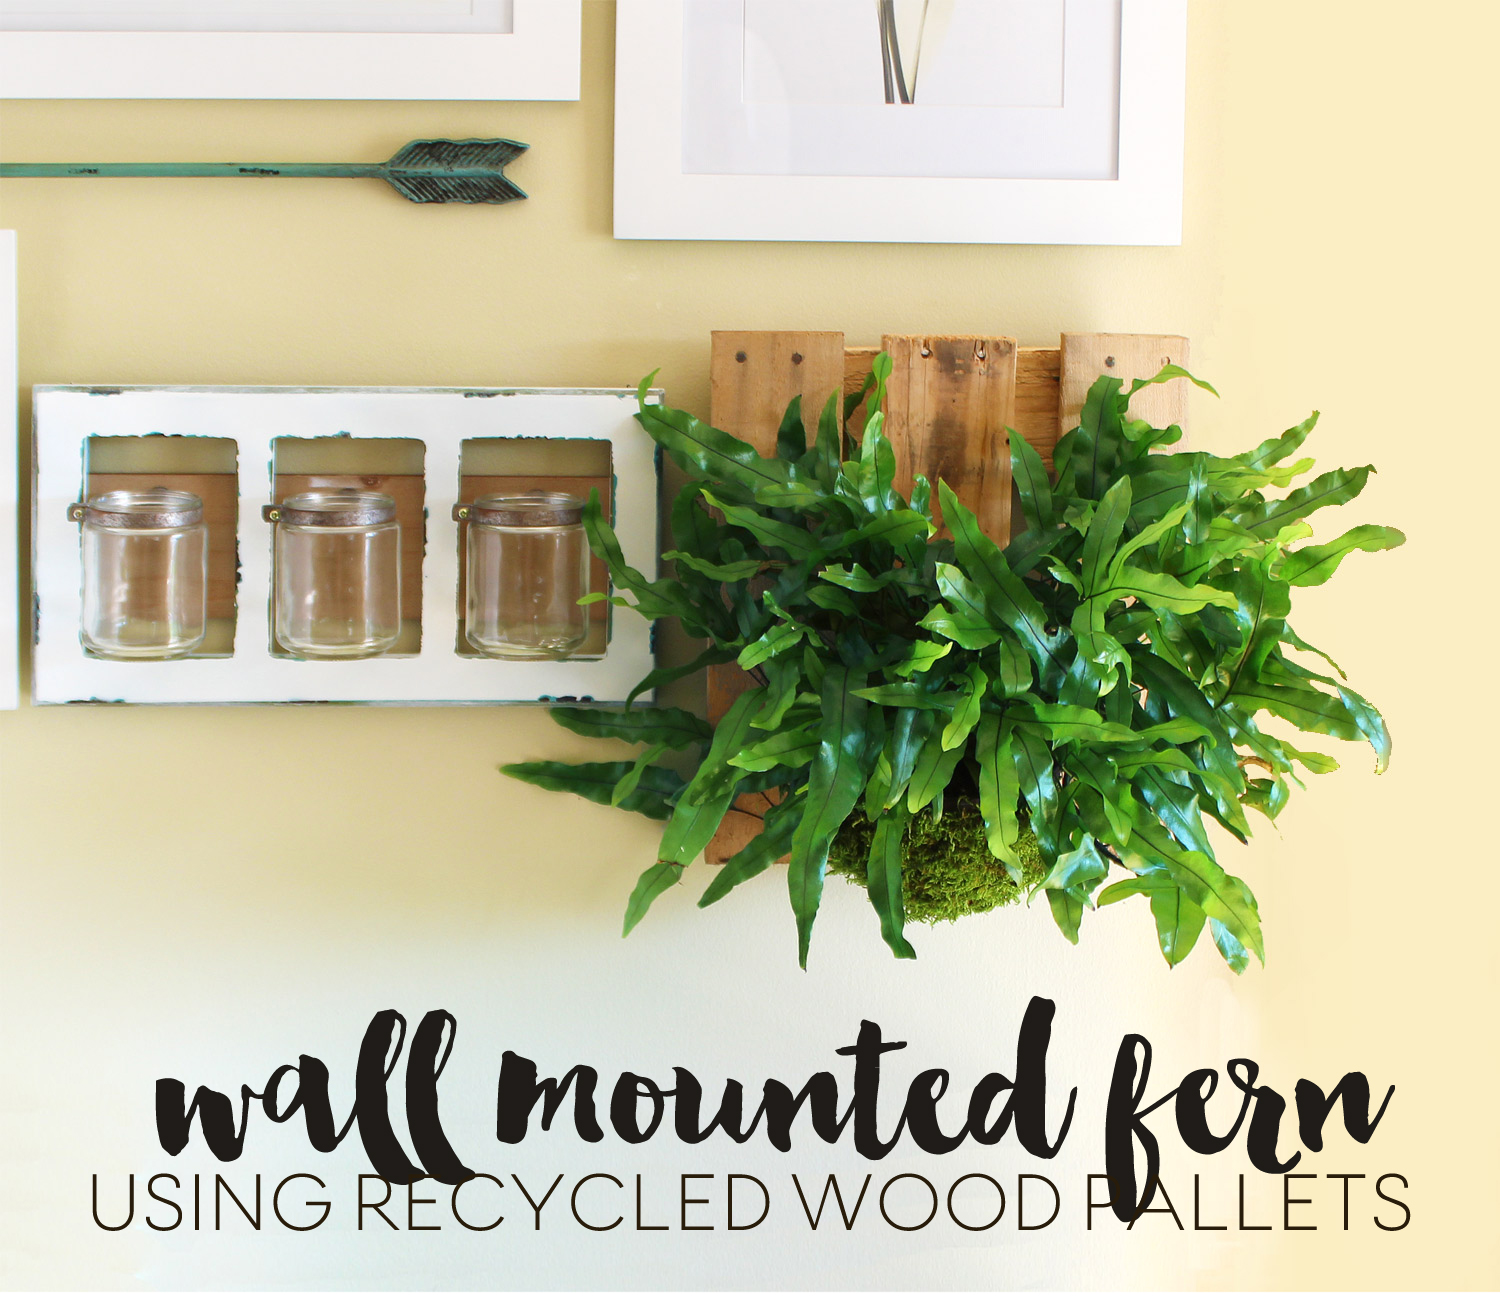
The plant I chose to use for this project is called a Kangaroo Paw Fern or Microsorum diversifolium. This type of plant is an epiphyte. Epiphytes are plants that live harmlessly upon another plant and do not require soil to survive and grow. Orchids and Air Plants are both examples of plants that grow without the need for soil. These plants get all of their moisture and nutritional needs from the air and debris around them.
What I love about the Kangaroo Fern is it's ability to thrive in dry air. Most ferns including the popular Staghorn fern, need very humid environments. This particular fern will thrive in medium to bright indoor light and the amount of humidity found in an average home.
If you plan on keeping your mounted fern outdoors there are a couple of facts to take into consideration. Make sure you keep the fern in a semi-shady to shady outdoor area. Once the weather starts to drop below 60F you'll want to bring the fern indoors. If you live in a warmer climate you can keep it outside year long. Although native of Australia, the Kangaroo Fern will grow most places in the US outdoors in a USDA Hardiness zone 9 and above. Make sure it gets a heavy watering once a week but doesn't remain wet. If you're going to transplant it use a good orchid potting mix.

- Wood pallets
- Kangaroo Paw or other epiphytic fern (in plastic hanging basket)
- Drill/Driver
- Circular Saw
- Sheet Moss
- 1" Multi-purpose Wood Screws
- Screw eyes and picture wire
- PVA Glue (White Elmer's glue)


You want three pieces 14½ inches in length for the front and an additional two boards 12½ inches wide to attach to the back.

To achieve a rustic look you'll want to keep the metal nails intact. If you used a crowbar to disassemble the pallet you'll be left with the nails poking through the boards. You can easily bend them back into the wood with your hammer. If you use a reciprocating saw you'll want to file away any sharp pieces of metal.

Screw in eye hooks and attach picture wire to the back side of frame mount.


Remove the plastic hooks and wires from the hanging basket.

Dilute your white PVA glue with water to achieve a fluid brush-able consistency. Apply to the hanging basket in order to adhere the sheet moss. Use picture wire, if needed, to wrap the moss onto the basket.

Next it's time to assemble and mount the fern basket onto the boards. But first, a little back story...
While I was working on this project I started noticing my drill wasn't holding a charge as well as it used to. Anyone who's had an older drill know what that's like. It can get a little frustrating. Well, I was in the middle of this project when I was totally rescued by BLACK+DECKER. I swear they read my mind. They sent me this awesome new 20V Lithium Drill to try out and it couldn't come at a better time. This was exactly what I needed; a super light weight, powerful drill. that was the perfect size for crafts and small DIY projects. I couldn't be happier. This new drill is quickly becoming my new best friend. It's even more powerful than my old drill and it's literally have the size and weight!So with my new drill in hand I was ready to finish up the project.

Before directly screwing on the basket you're going to want to pre-drill holes. Use a drill bit slightly smaller than the screws you're using. A quick way to determine the size of the drill bit to use is to hold the bit in front of the screw. You should only be able to see the threads and not the shaft.

You want to pre-drill the holes in order to ensure the wood doesn't split and the basket gets a tight fit. Next, carefully position the boards behind the fern basket. Screw right into the basket from behind the mount. I found that using two screws held the basket firmly in place.


After you have your basket secured you're all set to hang it up. Since the ferns are usually sold growing in a soilless medium of lightweight peat moss, your piece should be fairly light. Use standard picture frame hooks to mount it on the wall.

Now for the best part of today's post!
To help build your own wall mounted fern, 365Designs has teamed up with BLACK+DECKER for a giveaway any DIYer will love. You'll have a chance to win both 20V MAX Lithium Cordless Drill and 20V MAX Circular Saw valued at over $100!!To enter simply leave a comment below sharing how you'd use the new 20V MAX Lithium Cordless Drill!
Thanks for stopping by.
Please be sure to follow and subcribe
for exciting new ideas
and awesome giveaways!
Don't forget to leave a comment below
telling us how you'd use your new BLACK+DECKER
20V MAX Lithium Cordless Drill
for a chance to win!!!
telling us how you'd use your new BLACK+DECKER
20V MAX Lithium Cordless Drill
for a chance to win!!!

HOW TO ENTER: Contest begins 12:01AM EDT June 13, 2016 and ends 11:59PM EDT July 4, 2016. To enter, comment on 365designs.com in the applicable post's comment section. Applicants are limited to one entry per person per account. Open to legal residents of the 50 United States and the District of Columbia who are 18 years or older at time of entry (“Entrant(s)”). Void where prohibited by law. One winner will receive one 20V MAX Lithium drill/driver and one 20V MAX Lithium Cordless Saw. Winners will solely be responsible for all applicable taxes. Winner will be contacted by applicant's provided email and announced July 8, 2016 on 365designs.com.